Growing Garlic Around Fruit Trees

When it comes to sustainable and innovative gardening practices, the idea of planting garlic around fruit trees stands out as both practical and beneficial. This time-tested approach not only provides additional produce but also enhances the growth and health of the fruit trees. Let’s dive deep into the reasons why this method is gaining popularity among gardeners and farmers alike.

Growing Garlic Around Fruit Trees


Why Plant Garlic Around Fruit Trees?

The practice of intercropping—growing different crops together—has been a cornerstone of agriculture for centuries. Planting garlic around fruit trees exemplifies this concept, offering a harmonious relationship between the two plants. Here’s why it works so well:

  1. Natural Pest Repellent Garlic contains sulfur compounds, such as allicin, that act as natural pesticides. These compounds repel harmful insects and pests that could otherwise damage fruit trees. Aphids, mites, and other sap-sucking pests tend to avoid areas where garlic is grown.

  2. Disease Prevention Fruit trees are susceptible to various fungal infections and diseases. Garlic’s natural antifungal properties combat these threats, reducing the spread of diseases and ensuring healthier trees.

  3. Improved Soil Health Garlic releases sulfur into the soil, which improves its overall health. This not only helps in combating harmful pathogens but also promotes the growth of beneficial microorganisms.

  4. Enhanced Nutrient Exchange Garlic and fruit trees can benefit from a symbiotic nutrient exchange in the soil. The roots of garlic enhance nutrient availability for the trees, leading to improved fruit quality and higher yields.


How Garlic Promotes Tree Growth

Garlic’s contribution to tree health extends beyond pest control. Its root system interacts with the soil and tree roots in ways that enhance growth.

  • Soil Aeration: Garlic’s roots help aerate the soil, improving water absorption and reducing compaction around the tree’s root system.

  • Reduced Weed Growth: Garlic acts as a natural mulch, suppressing weed growth around fruit trees and reducing competition for nutrients.

  • Balanced Ecosystem: By planting garlic, gardeners can create a balanced ecosystem, promoting biodiversity in the orchard.


Planting Garlic: Step-by-Step Guide

If you’re inspired to give this method a try, follow these simple steps:

  1. Choose the Right Garlic Variety Select a garlic variety suited to your local climate. Hardneck and softneck varieties are the most common.

  2. Prepare the Soil Ensure the soil around your fruit trees is loose and well-drained. Garlic thrives in nutrient-rich soil with a slightly acidic to neutral pH.

  3. Spacing and Placement Plant garlic cloves around the drip line of your fruit tree. This is the area where water drips off the outermost branches. Maintain a spacing of 4-6 inches between cloves.

  4. Planting Depth Bury each clove about 2 inches deep with the pointed end facing upwards. Cover with soil and water lightly.

  5. Mulching Apply a layer of organic mulch, such as straw or dried leaves, to retain moisture and regulate soil temperature.

  6. Watering and Maintenance Keep the soil consistently moist but not waterlogged. Regularly weed the area to prevent competition for nutrients.


Garlic and Ancient Farming Traditions

Historically, farmers have recognized the benefits of growing garlic alongside other crops. Ancient agricultural practices incorporated garlic not just for its culinary uses but also as a natural protector of plants. Farmers in various cultures used garlic to:

  • Ward off harmful insects.

  • Maintain soil fertility.

  • Create a harmonious planting system that mimics natural ecosystems.


Modern Applications and Success Stories

In recent years, sustainable farming practices have brought renewed attention to intercropping techniques like planting garlic around fruit trees. Many orchard owners report noticeable improvements in tree health and fruit quality after implementing this method.

For instance:

  • Organic Orchards: Several organic farmers have adopted this practice to minimize chemical pesticide use while maintaining tree health.

  • Home Gardeners: Hobby gardeners find garlic an easy and rewarding crop to grow, providing both culinary benefits and tree protection.


Environmental Benefits

Growing garlic around fruit trees also has broader environmental advantages:

  • Reduced Chemical Use: By leveraging garlic’s natural properties, farmers can reduce their reliance on synthetic pesticides and fertilizers.

  • Biodiversity: This practice encourages a diverse range of microorganisms and beneficial insects in the soil.

  • Soil Conservation: Garlic helps prevent soil erosion, especially in orchards located on slopes.


Common Mistakes to Avoid

While the benefits are many, it’s important to avoid common pitfalls:

  1. Overcrowding: Planting garlic too close to the tree trunk can lead to competition for nutrients.

  2. Poor Soil Preparation: Neglecting soil health can hinder garlic growth and its benefits.

  3. Inconsistent Watering: Overwatering or underwatering can affect garlic’s ability to thrive.


Conclusion

Planting garlic around fruit trees is a simple yet effective way to enhance tree health, improve fruit quality, and promote sustainable gardening practices. Whether you’re a home gardener or a seasoned farmer, this method offers numerous benefits for your orchard and the environment. By understanding and implementing this age-old technique, you can create a thriving ecosystem that rewards you with bountiful harvests and robust trees.

Natural Rooting Hormones for Plant Cuttings: Boost Growth Organically

Rooting hormones play a crucial role in propagating plants from cuttings, helping them develop healthy roots faster and more effectively. While commercial rooting powders and gels are readily available, many gardeners prefer natural and organic alternatives. These natural solutions are free of chemicals, easy to make at home, and equally effective when used correctly. This article explores the importance of rooting hormones, provides a list of natural options, and offers tips for successful propagation.

natural rooting hormones for plant cuttings

What Are Rooting Hormones and Why Are They Important?

Rooting hormones are substances that stimulate root growth in plant cuttings. They can be synthetic or natural, but their primary function remains the same: encouraging the cutting to produce roots quickly. This process is vital because cuttings do not have an established root system to absorb water and nutrients. Without roots, a cutting struggles to survive, much less thrive.

Natural rooting hormones are an excellent alternative for gardeners who prioritize sustainability and want to avoid synthetic chemicals. They’re also cost-effective and can be made from ingredients found in most kitchens or gardens.

Best Natural Rooting Hormones for Plant Cuttings

Here’s a list of natural, organic substances that can be used as rooting hormones:

1. Willow Water

Willow trees contain a natural hormone called salicylic acid, which has root-promoting properties. To make willow water:

  • Collect young willow branches (preferably from new growth).

  • Chop them into small pieces and soak them in water for 24-48 hours.

  • Use this infused water to soak your plant cuttings before planting.

Willow water not only promotes root growth but also protects the cutting from infections, thanks to its antifungal properties.

2. Honey

Honey is a natural antibacterial and antifungal agent, making it an excellent choice for protecting cuttings. While it’s not a hormone itself, honey helps create an ideal environment for root development.

  • Mix one tablespoon of honey in two cups of warm water.

  • Dip the cut end of your cutting into this solution before planting.

The protective barrier created by honey reduces the risk of infections and encourages healthier root growth.

3. Apple Cider Vinegar (ACV)

Apple cider vinegar contains acetic acid, which can stimulate root growth in small quantities. Be cautious, as too much vinegar can harm the cutting.

  • Mix one teaspoon of ACV in six cups of water.

  • Dip the cutting briefly into the diluted solution before planting.

This simple method ensures the cutting gets a gentle boost without the risk of overexposure.

4. Aloe Vera Gel

Aloe vera is packed with vitamins, enzymes, and other compounds that stimulate root growth and protect cuttings from infections.

  • Extract fresh gel from an aloe vera leaf.

  • Dip the cut end of the plant cutting directly into the gel.

  • Alternatively, mix aloe gel with water and use it to soak the cuttings.

Aloe vera’s natural healing properties make it ideal for fragile cuttings.

5. Cinnamon Powder

Cinnamon is another natural option that acts as a fungicide, preventing infections while promoting root growth.

  • Simply dip the cut end of the cutting into cinnamon powder before planting.

  • You can also mix cinnamon powder with water to create a paste and coat the cutting.

This simple spice is surprisingly effective and readily available in most kitchens.

6. Coconut Water

Coconut water is rich in cytokinins, natural plant hormones that encourage cell division and root growth.

  • Use fresh coconut water as a rooting solution by soaking the cuttings for a few hours before planting.

  • Alternatively, dilute coconut water with an equal amount of plain water for gentler effects.

This organic solution is particularly effective for tender cuttings that require gentle care.

7. Banana Peel Tea

Bananas are loaded with potassium and other nutrients that support plant health. While not a direct rooting hormone, banana peel tea can provide nutrients to encourage root growth.

  • Soak banana peels in water for 24 hours.

  • Use this nutrient-rich water to soak your cuttings or water them after planting.

Banana peel tea is a great way to recycle kitchen waste while boosting plant growth.

8. Lentil Soak

Lentils contain auxins, a group of plant hormones that promote root development.

  • Soak lentils in water overnight.

  • Blend the soaked lentils with their water to create a paste.

  • Strain the mixture to extract the liquid, and use it as a rooting solution for your cuttings.

Lentil water is a natural, nutrient-rich alternative to commercial rooting products.

9. Seaweed Extract

Seaweed is rich in growth-stimulating compounds, including auxins and cytokinins. While commercial seaweed extracts are available, you can also make your own:

  • Collect fresh seaweed and rinse it thoroughly to remove salt.

  • Soak the seaweed in water for a few days.

  • Use the resulting liquid as a rooting solution.

Seaweed extract not only promotes rooting but also strengthens plants against stress.

How to Use Natural Rooting Hormones Effectively

To maximize the effectiveness of natural rooting hormones, follow these steps:

  1. Prepare Healthy Cuttings:

    • Choose cuttings from healthy, disease-free plants.

    • Cut just below a node, which is where roots are most likely to form.

  2. Apply the Rooting Hormone:

    • Dip the cut end of the cutting into your chosen natural rooting hormone.

    • Ensure the hormone coats the base evenly.

  3. Plant in Suitable Medium:

    • Use a well-draining rooting medium like perlite, vermiculite, or a mix of sand and peat moss.

    • Keep the soil moist but not waterlogged.

  4. Provide Proper Conditions:

    • Place the cuttings in a warm, humid environment with indirect light.

    • Use a clear plastic cover or a propagator to maintain humidity.

  5. Be Patient:

    • Rooting takes time, so monitor the cuttings regularly and avoid disturbing them unnecessarily.

Benefits of Using Natural Rooting Hormones

  • Eco-Friendly: Natural rooting hormones reduce reliance on synthetic chemicals, making them better for the environment.

  • Cost-Effective: Most ingredients are readily available in homes or gardens, saving money on commercial products.

  • Safe for Plants and Soil: Organic substances improve soil health and do not introduce harmful residues.

  • Multipurpose: Many natural rooting hormones, like honey and cinnamon, have additional benefits, such as antifungal properties.

Common Mistakes to Avoid

While natural rooting hormones are effective, certain pitfalls can hinder their success:

  1. Overapplication: Using too much of a solution like apple cider vinegar can harm the cutting instead of helping it.

  2. Improper Storage: Freshly prepared solutions like willow water and banana tea should be used promptly to retain potency.

  3. Poor Cutting Preparation: Not cutting at the right angle or failing to remove lower leaves can reduce rooting success.

  4. Inconsistent Care: Neglecting humidity, temperature, or moisture levels can hinder root growth, even with the best rooting hormone.

Conclusion

Natural rooting hormones are a fantastic way to propagate plants sustainably and effectively. Options like willow water, honey, aloe vera, and cinnamon offer gardeners organic, chemical-free alternatives to commercial products. With patience, proper care, and these natural solutions, you can successfully grow strong, healthy plants from cuttings. So, embrace these eco-friendly methods, and let nature do the rest!


Understanding Microclimates in California Gardening: Maximizing Your Garden’s Potential

 California’s diverse geography and climate zones make it one of the most exciting and challenging places for gardening. From coastal fog to arid deserts, microclimates play a pivotal role in determining the success of your garden. Understanding and leveraging microclimates can help you grow thriving plants, conserve water, and optimize yields. In this comprehensive guide, we’ll explore what microclimates are, how to identify them in your area, and tips for using them to your advantage.

What Are California Garden Microclimates?

A California garden microclimate is a small, localized zone where temperature, humidity, sun exposure, and wind differ from the general regional forecast. Factors like coastal fog banks, urban heat islands, stucco wall reflections, and elevation shifts create distinct growing pockets—allowing frost-sensitive citrus to survive in a cold zone or cool-season vegetables to bolt in inland heat.
California Microclimate ZoneKey CharacteristicsBest Vegetables & Fruits to GrowBiggest Garden Challenge
Coastal Fog Belt (SF Bay, Santa Cruz)Low daytime heat, high humidity, mild wintersKale, peas, brassicas, Meyer lemonsPowdery mildew, lack of heat for tomatoes
Inland Valleys (Central Valley, Sacramento)100°F+ dry summers, freezing winter dipsTomatoes, peppers, figs, stone fruitSunscald, heavy clay soil, summer drought
Southern Coastal/Mesa (San Diego, Orange Co.)Year-round mild temps, minimal frost riskAvocados, subtropicals, year-round greensWater rationing, poor native soil biology
Foothill & Mountain (Sierra Foothills)Distinct freeze dates, rocky alkaline terrainApples, garlic, root crops, cold-hardy berriesLate spring frosts killing tender blossoms

Understanding Microclimates in California Gardening: Maximizing Your Garden’s Potential


What Are Microclimates?

A microclimate is a localized climate in a small, specific area that differs from the surrounding region. Microclimates can vary based on factors like elevation, proximity to water bodies, sun exposure, and man-made structures.

For gardeners in California, microclimates can mean the difference between a bountiful harvest and struggling plants. Identifying your garden’s microclimate allows you to select the best plants and optimize your gardening techniques.

Read also;


The Five Main Types of Microclimates in California

1. Coastal Microclimates

  • Characteristics: Cool temperatures, high humidity, and frequent fog.
  • Best Plants: Leafy greens, strawberries, and herbs like cilantro and parsley.
  • Tips for Gardening:
    • Use raised beds to improve drainage in areas with heavy fog.
    • Choose salt-tolerant plants if near the ocean.

2. Inland Valley Microclimates

  • Characteristics: Warm days and cool nights, with moderate rainfall.
  • Best Plants: Tomatoes, peppers, citrus, and avocados.
  • Tips for Gardening:
    • Use mulch to regulate soil temperature during temperature swings.
    • Install shade cloths during summer to prevent heat stress.

3. Desert Microclimates

  • Characteristics: Intense heat, low humidity, and minimal rainfall.
  • Best Plants: Cactus, succulents, and drought-tolerant vegetables like eggplant and okra.
  • Tips for Gardening:
    • Utilize drip irrigation to conserve water.
    • Plant in the early morning or evening to reduce water evaporation.

4. Mountain Microclimates

  • Characteristics: Cool temperatures, higher rainfall, and occasional snow.
  • Best Plants: Root vegetables like carrots and beets, as well as hardy greens like kale.
  • Tips for Gardening:
    • Use frost covers to protect plants during cold snaps.
    • Choose short-season varieties that mature quickly.

5. Urban Microclimates

  • Characteristics: Warmer temperatures due to heat retention from buildings and pavement.
  • Best Plants: Herbs, compact vegetables, and flowers like marigolds.
  • Tips for Gardening:
    • Utilize vertical gardening techniques to maximize limited space.
    • Place plants in containers for easy relocation based on sun exposure.

How to Identify Your Garden’s Microclimate

1. Observe Sun Patterns

Track how sunlight moves across your garden. Areas with full sun will be warmer, while shaded spots remain cooler.

2. Monitor Temperature Variations

Invest in a thermometer to measure temperature fluctuations between different garden areas.

3. Check Soil Drainage

Well-drained areas may be better for drought-tolerant plants, while water-retentive spots suit moisture-loving crops.

4. Note Wind Patterns

Wind exposure can dry out plants and cool the soil. Windbreaks like hedges or fences can create a more favorable microclimate.

5. Identify Man-Made Structures

Walls, patios, and driveways absorb heat during the day and release it at night, creating warmer zones ideal for heat-loving plants.


Gardening Tips for California Microclimates

1. Choose the Right Plants for Your Microclimate

Select plants that are naturally suited to your garden’s conditions. For example, succulents thrive in desert microclimates, while lettuces prefer coastal fog.

2. Leverage Natural Features

Use trees, shrubs, or fences to create shade or block wind in vulnerable areas.

3. Install Raised Beds

Raised beds improve soil drainage and can help mitigate issues in areas prone to heavy rain or poor drainage.

4. Optimize Watering Practices

Adjust watering frequency based on the needs of each microclimate zone in your garden.

5. Use Mulch

Mulching helps regulate soil temperature, conserve moisture, and reduce weeds in any microclimate.

6. Incorporate Companion Planting

Group plants with similar water and sunlight needs to simplify garden maintenance.


Examples of Microclimate Gardening in California

1. Coastal Garden in Santa Cruz

A gardener leverages the foggy mornings to grow lush spinach, kale, and parsley. They use raised beds to counteract excess moisture and plant wind-tolerant flowers like nasturtiums to protect vegetables.

2. Inland Valley Citrus Orchard in Fresno

By using mulch and drip irrigation, a gardener grows oranges and lemons in the warm inland valley. Shade cloths are set up during heat waves to prevent sunburn on fruits.

3. Desert Garden in Palm Springs

A gardener plants drought-resistant eggplants and peppers in a small desert garden. They use reflective mulch to reduce heat stress and drip irrigation to save water.


Benefits of Understanding Microclimates in California Gardening

  1. Maximized Yields: Plants grow better when matched with the right microclimate.
  2. Water Efficiency: Tailored irrigation systems reduce water waste.
  3. Pest Control: Microclimate management can deter pests and diseases.
  4. Extended Growing Seasons: Utilize microclimates to grow crops beyond their usual seasons.
  5. Sustainability: Reduce your garden’s environmental impact with efficient practices.

Common Challenges and Solutions

1. Frost in Mountain Microclimates

  • Solution: Use frost cloths and plant hardy winter crops.

2. Heat Stress in Urban or Desert Microclimates

  • Solution: Install shade cloths or grow heat-tolerant plants like succulents.

3. Excess Moisture in Coastal Microclimates

  • Solution: Plant in raised beds and improve soil drainage.

4. Wind Damage in Exposed Areas

  • Solution: Create windbreaks with hedges or temporary screens.

Tools and Resources for California Microclimate Gardening

  1. Sun Tracking Apps: Apps like SunCalc help track sunlight patterns.
  2. Soil Testing Kits: Test soil pH and fertility to understand your garden’s needs.
  3. Drip Irrigation Systems: Efficiently water plants in different microclimates.
  4. Local Extension Offices: Access region-specific gardening advice.

Conclusion

Understanding and leveraging microclimates is a game-changer for California gardeners. By identifying the unique characteristics of your garden and tailoring your approach, you can grow healthier plants, save water, and enhance your gardening success. Whether you’re dealing with coastal fog, desert heat, or urban warmth, adapting to microclimates allows you to create a thriving garden that works in harmony with nature.

Start exploring your garden’s microclimate today and discover the incredible potential hidden in every corner of your yard!

Drought-Tolerant Vegetables for Winter

California’s ongoing water challenges make it essential for gardeners to choose crops that thrive in low-water conditions. Fortunately, even during winter, there are plenty of drought-tolerant vegetables that can flourish with minimal irrigation while offering fresh, nutritious produce. This guide focuses on drought-tolerant vegetables suited for California winters, how to grow them, and tips for maintaining a thriving winter garden.

Drought-Tolerant Vegetables for Winter

Why Focus on Drought-Tolerant Vegetables in California?

California's Mediterranean climate and frequent droughts create unique challenges for gardeners. Emphasizing drought-tolerant vegetables helps in:

  1. Water Conservation: Reducing water usage while maintaining a productive garden.
  2. Cost Savings: Lower water bills, particularly in areas where water rates are high.
  3. Sustainable Gardening: Contributing to environmentally friendly practices by growing crops suited to local conditions.

Top Drought-Tolerant Vegetables for California Winters

1. Kale

  • Why It’s Drought-Tolerant: Kale has deep roots that can access moisture below the soil surface.
  • Varieties to Grow: Curly kale, Lacinato (Dinosaur) kale, and Red Russian kale.
  • Growing Tips:
    • Plant in well-drained soil with a thick layer of mulch to retain moisture.
    • Water deeply once a week to encourage deep root growth.

2. Swiss Chard

  • Why It’s Drought-Tolerant: Swiss chard is hardy and can withstand periods of dry soil.
  • Varieties to Grow: Rainbow chard and Fordhook Giant.
  • Growing Tips:
    • Choose a sunny location and amend the soil with organic matter.
    • Harvest outer leaves regularly to encourage new growth.

3. Carrots

  • Why It’s Drought-Tolerant: Carrots develop long taproots that seek moisture deep in the soil.
  • Varieties to Grow: Nantes, Danvers, and Chantenay.
  • Growing Tips:
    • Sow seeds directly in loose, sandy soil.
    • Water sparingly to prevent splitting but ensure consistent moisture for germination.

4. Beets

  • Why It’s Drought-Tolerant: Like carrots, beets have deep roots that access underground water reserves.
  • Varieties to Grow: Detroit Dark Red, Chioggia, and Golden beets.
  • Growing Tips:
    • Plant in well-drained soil with organic compost.
    • Thin seedlings to allow roots to expand without competing for water.

5. Fava Beans

  • Why It’s Drought-Tolerant: Fava beans grow well with minimal water once established and improve soil fertility by fixing nitrogen.
  • Varieties to Grow: Broad Windsor and Aquadulce.
  • Growing Tips:
    • Plant in the fall for a winter harvest.
    • Use drip irrigation to deliver water efficiently.

6. Garlic

  • Why It’s Drought-Tolerant: Garlic requires very little water after the initial planting phase.
  • Varieties to Grow: Softneck (California Early, California Late) and Hardneck (Chesnok Red).
  • Growing Tips:
    • Plant cloves in well-drained soil in the fall.
    • Stop watering once the tops begin to yellow in late spring.

7. Onions

  • Why It’s Drought-Tolerant: Onions are shallow-rooted but resilient to dry spells.
  • Varieties to Grow: Walla Walla, Red Torpedo, and Yellow Granex.
  • Growing Tips:
    • Space bulbs 4–6 inches apart for better airflow.
    • Use mulch to retain soil moisture and suppress weeds.

8. Spinach

  • Why It’s Drought-Tolerant: Spinach grows quickly and requires less water during cooler months.
  • Varieties to Grow: Bloomsdale, Tyee, and Space.
  • Growing Tips:
    • Plant in partial shade if temperatures rise above average.
    • Harvest leaves frequently to encourage new growth.

9. Radishes

  • Why It’s Drought-Tolerant: Radishes mature quickly and require minimal water.
  • Varieties to Grow: Cherry Belle, French Breakfast, and White Icicle.
  • Growing Tips:
    • Sow seeds directly into well-drained soil.
    • Water lightly to keep the soil evenly moist for fast germination.

10. Mustard Greens

  • Why It’s Drought-Tolerant: Mustard greens thrive in dry conditions once established.
  • Varieties to Grow: Southern Giant Curled and Red Giant.
  • Growing Tips:
    • Plant in full sun or partial shade.
    • Harvest leaves when young for a milder flavor.

How to Cultivate Drought-Tolerant Vegetables

1. Soil Preparation

  • Test the soil pH (most vegetables prefer a pH of 6.0–7.0).
  • Add organic matter like compost or well-rotted manure to improve moisture retention.
  • Use raised beds for better drainage in areas prone to waterlogging.

2. Watering Techniques

  • Drip Irrigation: Provides water directly to the root zone, reducing evaporation.
  • Mulching: Apply a 2–3 inch layer of mulch to conserve soil moisture.
  • Deep Watering: Encourage deep root growth by watering less frequently but deeply.

3. Crop Rotation

Rotate crops annually to prevent nutrient depletion and minimize pests and diseases.

4. Planting Schedule

  • Start planting drought-tolerant vegetables in late summer or early fall for a winter harvest.
  • Succession planting ensures a continuous supply of fresh produce.

5. Fertilization

Use slow-release organic fertilizers to provide consistent nutrients without overwatering.


Tips for Maintaining a Thriving Winter Garden

  1. Monitor Soil Moisture: Use a moisture meter to ensure the soil remains at optimal levels.
  2. Protect from Frost: Use row covers, mulch, or cloches to shield plants during unexpected frost.
  3. Pest Control: Aphids, slugs, and caterpillars are common winter pests. Use natural remedies like neem oil or introduce beneficial insects.
  4. Pruning and Harvesting: Regularly remove dead or yellowing leaves to maintain plant health and encourage growth.

Sustainable Practices for Drought-Tolerant Gardening

  • Rainwater Harvesting: Collect rainwater to use during dry spells.
  • Companion Planting: Grow complementary plants together to maximize water efficiency (e.g., garlic with spinach).
  • Native Plants: Incorporate native drought-tolerant plants to support local ecosystems.

Benefits of Growing Drought-Tolerant Vegetables

  1. Eco-Friendly Gardening: Reduced reliance on water helps conserve resources.
  2. Low Maintenance: Drought-tolerant crops often require less care once established.
  3. Year-Round Harvests: With proper planning, you can enjoy fresh produce even during the driest winters.
  4. Cost-Effective: Save money on water bills and grocery expenses by growing your own vegetables.

Conclusion

Growing drought-tolerant vegetables in California during winter is both practical and rewarding. By choosing crops like kale, Swiss chard, carrots, and garlic, you can conserve water while enjoying a healthy, productive garden. With proper soil preparation, efficient watering techniques, and sustainable practices, your winter garden can thrive despite water limitations.

Embrace California’s unique climate by cultivating a garden that supports both your table and the environment. Whether you’re a seasoned gardener or a beginner, these tips and vegetable recommendations will help you make the most of your winter growing season.

Top 15 Expert Tips for Successful Flower Seed Germination

 Flower gardening begins with one of nature's most magical processes—seed germination. Whether you're cultivating vibrant sunflowers or delicate petunias, understanding the science and art of germinating flower seeds is crucial to ensuring your garden thrives. This comprehensive guide is tailored for USA gardeners, offering expert seedling germination tips to help you maximize your success.


Understanding Seed Germination Basics

Seed germination is the process where a seed develops into a seedling under optimal conditions. Each seed contains a tiny embryo that, when provided with the right environment, will sprout and grow. To succeed, focus on three key factors: water, temperature, and light.


Why Proper Germination Matters

Healthy germination leads to:

  1. Robust Growth: Ensures plants grow strong and resist pests.
  2. Higher Yield: Promotes a more abundant bloom in your flower garden.
  3. Cost Efficiency: Reduces the need for replanting, saving time and resources.

Now, let's dive into actionable tips to master seed germination for flowers.


15 Tips for Successful Flower Seed Germination

1. Choose Quality Seeds

Select seeds from reputable sources. Look for suppliers offering fresh, high-quality, and non-GMO seeds. For USA gardeners, consider vendors like Burpee, Johnny’s Selected Seeds, or American Meadows for regionally adapted varieties.

2. Understand Your Zone

The USDA Plant Hardiness Zone Map is an essential tool for gardeners. It helps you select flower varieties suitable for your local climate, ensuring better germination and plant health.

Understand Your Zone


3. Pre-Soak Your Seeds

Soaking seeds overnight in warm water softens their outer shell, speeding up germination. Use this technique for tough-shelled seeds like morning glories or sweet peas.

Pre-Soak Your Seeds


4. Use the Right Growing Medium

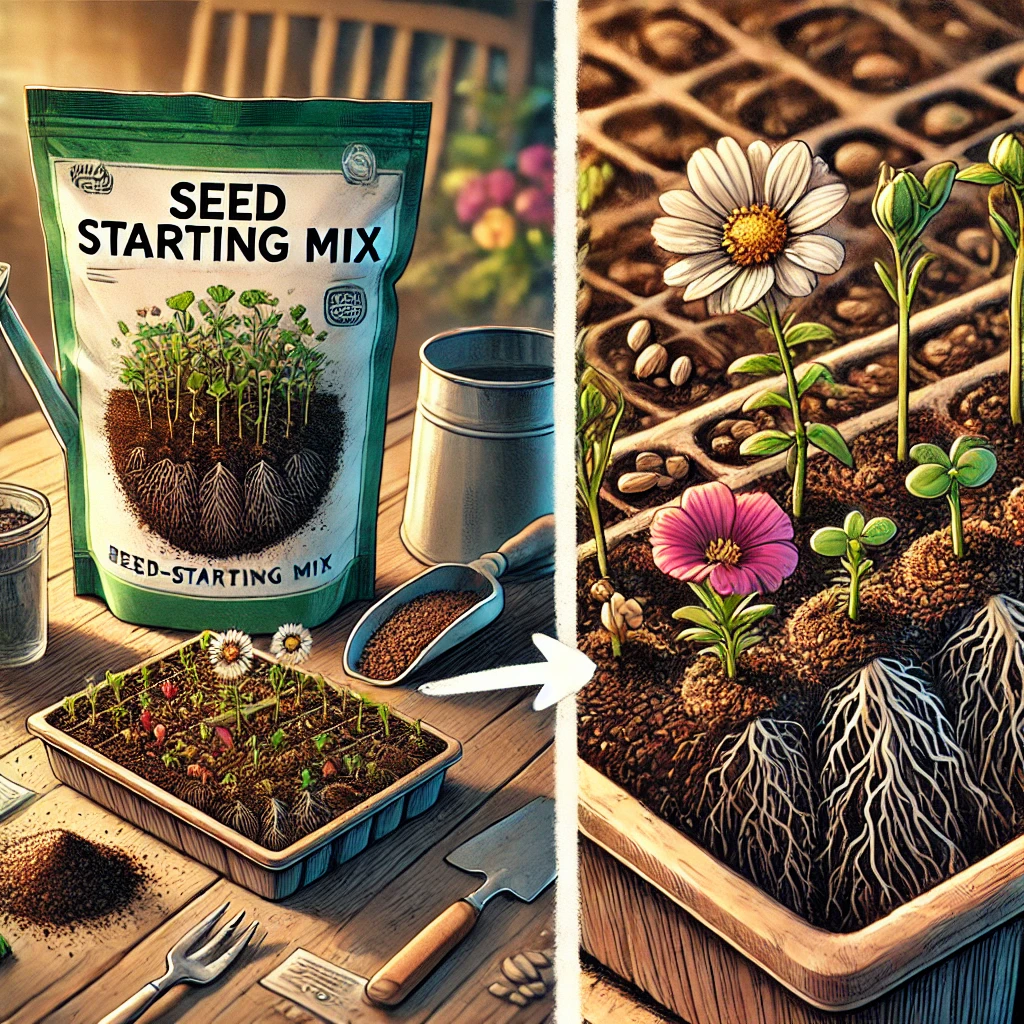
Opt for seed-starting mix rather than regular potting soil. These mixes are lighter, retain moisture well, and allow better root development.

Use the Right Growing Medium


5. Sterilize Your Tools and Soil

Avoid fungal diseases and pests by sterilizing trays, pots, and tools. Heat your soil in the oven at 180°F for 30 minutes to eliminate pathogens.

6. Maintain Proper Temperature

Most flower seeds germinate well between 65°F and 75°F. Use a seedling heat mat to maintain consistent soil warmth, especially in cooler regions.

7. Ensure Adequate Light

Seedlings need light to grow strong and healthy. Place trays near a sunny window or use fluorescent grow lights for 12-16 hours daily. Keep the light source 2-4 inches above the seedlings.

8. Water Wisely

Keep the soil consistently moist but not waterlogged. Use a spray bottle to mist the soil gently, avoiding overwatering, which can lead to rot.

9. Provide Good Air Circulation

Proper airflow prevents fungal diseases like damping-off. Use a small fan or open windows to improve ventilation.

10. Thin Out Seedlings

Once seeds sprout, thin them to prevent overcrowding. Leave the healthiest seedlings and snip the weaker ones at the soil line.

11. Harden Off Before Transplanting

Prepare seedlings for outdoor conditions by gradually exposing them to sunlight and outdoor temperatures over 7-10 days.

12. Use Labels

Mark seed trays with labels to identify varieties and their germination times. This step prevents confusion, especially if you’re growing multiple types of flowers.

13. Protect from Pests

Keep seedlings safe from pests like aphids, fungus gnats, and slugs. Use organic insecticides or physical barriers if needed.

14. Consider Stratification

Some flower seeds, like lavender and lupine, need cold stratification—a period of chilling before germination. Place seeds in the refrigerator for 2-8 weeks, mimicking winter conditions.

15. Be Patient

Not all seeds germinate at the same rate. While marigolds may sprout in a few days, delphiniums could take weeks. Patience is key.


Top Flower Varieties for USA Gardeners

Certain flower seeds are particularly well-suited for USA climates:

  1. Sunflowers: Hardy and easy to grow, perfect for summer blooms.
  2. Zinnias: Vibrant flowers that thrive in heat.
  3. Marigolds: Pest-resistant and low-maintenance.
  4. Cosmos: Ideal for beginners, producing blooms in various colors.
  5. Poppies: Adaptable to many regions, with stunning red and orange hues.

Troubleshooting Common Germination Problems

Problem 1: Seeds Not Sprouting

  • Cause: Improper temperature or insufficient water.
  • Solution: Check temperature consistency and ensure soil remains moist.

Problem 2: Seedlings Damping Off

  • Cause: Overwatering or poor airflow.
  • Solution: Improve ventilation, use sterile soil, and avoid overwatering.

Problem 3: Leggy Seedlings

  • Cause: Insufficient light.
  • Solution: Move seedlings closer to a light source or use grow lights.

Eco-Friendly Tips for Germination

  • Recycle Containers: Use egg cartons or yogurt cups as seed trays.
  • Compost Failed Seeds: Add unsprouted seeds to your compost pile.
  • Save Seeds: Collect seeds from mature flowers for future planting.

Conclusion: Grow Your Dream Garden

Germinating flower seeds is an exciting and rewarding experience, especially when you follow expert tips tailored to USA climates. By selecting the right seeds, creating ideal conditions, and troubleshooting common issues, you'll be well on your way to a thriving garden filled with vibrant blooms.

Start your gardening journey today with these practical steps, and watch your seeds flourish into breathtaking flowers. 🌸

Container Gardening Ideas for Vegetables

 Container gardening is a versatile and space-saving way to grow fresh vegetables at home, making it a favorite for urban dwellers and anyone with limited outdoor space. Whether you live in an apartment, have a small backyard, or simply want the convenience of mobile garden beds, container gardening allows you to cultivate a variety of vegetables year-round.

In this article, we’ll explore container gardening ideas for vegetables that thrive in pots and discuss how to create the perfect growing environment for each.

Container Gardening Ideas for Vegetables


Why Choose Container Gardening?

Container gardening is gaining popularity for several reasons:

  • Space Efficiency: Ideal for patios, balconies, and small yards.
  • Portability: Move plants to catch optimal sunlight or protect them from harsh weather.
  • Soil Control: Tailor soil quality to suit specific vegetable needs.
  • Pest Management: Containers reduce the risk of soil-borne pests and diseases.
  • Accessibility: Perfect for people with limited mobility who prefer raised gardening setups.

Essential Tips for Container Gardening Success

  1. Choose the Right Containers:

    • Opt for pots with good drainage holes.
    • Use materials like terracotta, plastic, or fabric grow bags.
    • Ensure the size matches the vegetable's root requirements.
  2. Use High-Quality Soil:

    • Avoid garden soil; use a lightweight potting mix enriched with compost.
    • Add perlite or vermiculite for better aeration.
  3. Sunlight Requirements:

    • Most vegetables need at least 6–8 hours of sunlight daily.
    • Position containers in the sunniest spot available.
  4. Water Consistently:

    • Containers dry out faster than garden beds. Water deeply but avoid waterlogging.
  5. Fertilize Regularly:

    • Use organic fertilizers or slow-release granules every few weeks.
  6. Rotate Crops:

    • To prevent soil nutrient depletion, switch vegetable varieties after harvest.

Best Vegetables for Container Gardening

1. Tomatoes

Tomatoes are one of the most popular vegetables for container gardening.

  • Varieties: Cherry tomatoes, Roma, or dwarf bush varieties like "Tiny Tim."
  • Container Size: Minimum 5-gallon pot or bucket.
  • Care Tips:
    • Use a stake or cage for support.
    • Water deeply to prevent blossom-end rot.

2. Peppers

Peppers, both sweet and spicy, thrive in containers.

  • Varieties: Bell peppers, jalapeΓ±os, or cayenne.
  • Container Size: 3–5 gallons.
  • Care Tips:
    • Place in full sun.
    • Harvest regularly to encourage more fruiting.

3. Leafy Greens

Leafy greens grow quickly and require minimal space.

  • Varieties: Lettuce, spinach, kale, and arugula.
  • Container Size: Shallow trays or 6–8-inch pots.
  • Care Tips:
    • Harvest outer leaves to allow continuous growth.
    • Shade during extreme heat to prevent bolting.

4. Carrots

Carrots are a root vegetable that adapts well to deep containers.

  • Varieties: Short varieties like "Thumbelina" or "Paris Market."
  • Container Size: At least 12 inches deep.
  • Care Tips:
    • Ensure loose, sandy soil for straight growth.
    • Thin seedlings to prevent overcrowding.

5. Radishes

Radishes are fast-growing and perfect for beginners.

  • Varieties: Cherry Belle, French Breakfast.
  • Container Size: Shallow containers, 6–8 inches deep.
  • Care Tips:
    • Plant seeds directly into the container.
    • Harvest within 3–4 weeks.

6. Zucchini and Squash

Compact zucchini and squash varieties grow well in larger containers.

  • Varieties: "Bush Baby," "Patio Star."
  • Container Size: 5–7 gallons.
  • Care Tips:
    • Provide a trellis or support for climbing types.
    • Harvest young for the best flavor.

7. Beans

Beans are versatile and can be grown as bush or pole types.

  • Varieties: Green beans, wax beans, or string beans.
  • Container Size: Minimum 12 inches wide and deep.
  • Care Tips:
    • Use a trellis for pole beans.
    • Pick beans frequently to stimulate production.

8. Cucumbers

Cucumbers thrive in containers with vertical support.

  • Varieties: "Spacemaster," "Bush Champion."
  • Container Size: 5-gallon container.
  • Care Tips:
    • Train vines on a trellis.
    • Ensure consistent watering to avoid bitterness.

9. Herbs (Bonus for Flavorful Meals)

Although not vegetables, herbs like basil, parsley, and cilantro are excellent container additions.


Creative Ideas for Container Gardening

  1. Hanging Baskets:

    • Grow trailing plants like cherry tomatoes or herbs.
  2. Vertical Gardens:

    • Use wall-mounted pockets or tiered racks for leafy greens.
  3. Repurposed Containers:

    • Turn old buckets, crates, or even bathtubs into vegetable planters.
  4. Companion Planting in Containers:

    • Pair tomatoes with basil or carrots with radishes to maximize space.
  5. Self-Watering Containers:

    • Ideal for busy gardeners to maintain consistent moisture.

Seasonal Planting Guide for the USA

  • Spring: Lettuce, spinach, radishes, and peas.
  • Summer: Tomatoes, peppers, zucchini, and cucumbers.
  • Fall: Kale, carrots, and broccoli.
  • Winter (Indoors): Herbs and microgreens with grow lights.

Troubleshooting Common Container Gardening Problems

  1. Yellowing Leaves:

    • Cause: Overwatering or nutrient deficiency.
    • Solution: Adjust watering and fertilize.
  2. Wilting Plants:

    • Cause: Underwatering or root rot.
    • Solution: Check soil moisture and improve drainage.
  3. Pests:

    • Common pests include aphids and spider mites.
    • Solution: Use neem oil or insecticidal soap.

Benefits of Growing Vegetables in Containers

  • Fresh, organic produce at your fingertips.
  • Significant savings compared to store-bought vegetables.
  • A rewarding hobby that promotes mental well-being.

Final Thoughts

Container gardening offers endless possibilities for growing fresh, healthy vegetables, even in the smallest spaces. By choosing the right vegetables, containers, and care methods, you can enjoy a thriving garden that fits seamlessly into your lifestyle.

Start small, experiment with different vegetables, and watch your home transform into a lush oasis of greenery and flavor. Happy gardening!

How to Buy Professional Gardening Gloves for Gardening

 Gardening is not only a fulfilling hobby but also a great way to connect with nature, improve mental health, and beautify your surroundings. However, it can be tough on your hands, exposing them to thorns, dirt, blisters, and insect bites. That's where professional gardening gloves come in. Investing in the right pair of gloves is essential for ensuring comfort, protection, and efficiency during gardening tasks.

In this article, we’ll guide you through everything you need to know about buying professional gardening gloves for men and women. Whether you're a beginner or an experienced gardener, this comprehensive guide will help you choose the perfect pair.

How to Buy Professional Gardening Gloves for Gardening


Why Do You Need Professional Gardening Gloves?

Gardening gloves are not just an accessory; they are a necessity for anyone working in a garden. Here are some reasons why:

1. Hand Protection

Gardening gloves shield your hands from cuts, scratches, and blisters while handling tools, pruning plants, or removing weeds. They also provide protection from harmful chemicals in fertilizers and pesticides.

2. Enhanced Grip

A good pair of gloves improves your grip on tools and plants, especially when dealing with slippery or wet materials.

3. Hygiene

Gloves keep your hands clean and prevent dirt, mud, and grime from getting under your nails.

4. Comfort

Quality gloves reduce hand fatigue by providing adequate padding and support during prolonged gardening sessions.

5. Safety

They protect against harmful plants like poison ivy and deter insect bites and stings.


Key Features to Look for in Gardening Gloves

When shopping for gardening gloves, consider the following features to ensure they meet your needs:

1. Material

The material of the gloves significantly impacts their durability, flexibility, and protection level. Common materials include:

  • Leather: Offers excellent durability and protection from thorns and sharp objects. Ideal for heavy-duty gardening tasks.
  • Cotton: Lightweight and breathable, suitable for light gardening tasks.
  • Rubber or Nitrile: Provides waterproofing and protection against chemicals.
  • Synthetic Materials: Often a mix of different fibers, offering a balance of durability and comfort.

2. Fit and Size

Proper fit is crucial for comfort and efficiency. Gloves that are too tight can cause discomfort, while loose gloves can hinder your grip. Look for gloves with adjustable cuffs or elastic bands for a secure fit.

3. Padding and Reinforcement

For tasks requiring repetitive motions or heavy lifting, gloves with padded palms and reinforced fingertips are beneficial. They reduce stress on your hands and increase durability.

4. Breathability

Gardening can be sweaty work, so choose gloves with breathable materials or ventilation features to keep your hands dry and comfortable.

5. Flexibility

Gloves should allow easy movement of your fingers for delicate tasks like planting seeds or handling fragile plants.

6. Waterproofing

If you work with wet soil or water plants regularly, waterproof gloves will keep your hands dry and warm.

7. Thorn and Puncture Resistance

For tasks like pruning roses or dealing with thorny plants, choose gloves with high puncture resistance to avoid injuries.


Types of Gardening Gloves

Understanding the types of gardening gloves available can help you choose the right one for specific tasks:

1. All-Purpose Gardening Gloves

  • Best for general gardening tasks like planting and weeding.
  • Usually made from cotton or synthetic materials.

2. Heavy-Duty Gloves

  • Ideal for demanding tasks like digging, pruning, or handling sharp tools.
  • Made from durable materials like leather or reinforced synthetic fibers.

3. Chemical-Resistant Gloves

  • Perfect for handling fertilizers, pesticides, or other chemicals.
  • Made from rubber, nitrile, or PVC.

4. Thorn-Resistant Gloves

  • Designed to protect against thorns and sharp objects.
  • Typically made from thick leather or heavy-duty synthetic materials.

5. Waterproof Gloves

  • Suitable for working in wet soil or rainy conditions.
  • Often made with rubber or coated fabrics.

Tips for Choosing Gardening Gloves for Men and Women

1. Consider Your Gardening Tasks

Think about the type of gardening you do most frequently. For instance, if you deal with roses, opt for thorn-resistant gloves. For planting and weeding, lightweight all-purpose gloves will suffice.

2. Check for Gender-Specific Designs

While many gloves are unisex, some brands offer designs tailored for men or women. Women’s gloves typically have a narrower fit, while men’s gloves are broader.

3. Focus on Comfort

Try on gloves before purchasing to ensure they feel comfortable. If buying online, read reviews and check size charts carefully.

4. Look for Adjustable Features

Adjustable cuffs or straps ensure a secure fit and prevent dirt from entering the gloves.

5. Prioritize Quality

Invest in high-quality gloves that offer durability and protection. They may cost more initially but will last longer and perform better.


Top Brands for Professional Gardening Gloves

Here are some reputable brands that offer high-quality gardening gloves for men and women:

  1. Foxgloves: Known for stylish and durable gloves suitable for light gardening tasks.
  2. Bionic: Offers ergonomically designed gloves with excellent grip and comfort.
  3. Atlas: Provides affordable and durable gloves for various gardening needs.
  4. Gold Leaf: Premium gloves made from high-quality materials, ideal for heavy-duty tasks.
  5. Wells Lamont: Known for leather gloves offering excellent thorn resistance.

Maintaining Your Gardening Gloves

Proper care and maintenance can extend the lifespan of your gardening gloves:

1. Clean Regularly

Wash your gloves according to the manufacturer’s instructions. For leather gloves, use a damp cloth and mild soap. Avoid soaking them in water.

2. Dry Properly

Allow gloves to air dry completely before storing them. Avoid direct sunlight, which can cause materials to degrade.

3. Store Safely

Keep your gloves in a cool, dry place to prevent mold or mildew.

4. Inspect for Damage

Check for holes, tears, or worn-out areas and replace gloves when necessary to ensure adequate protection.


Final Thoughts

Choosing the right pair of professional gardening gloves can make a world of difference in your gardening experience. By considering factors like material, fit, durability, and the specific tasks you perform, you can find gloves that meet your needs and preferences. Don’t forget to invest in reputable brands and care for your gloves to get the most out of them.

Gardening should be enjoyable and safe, so protect your hands with the best gloves available. Whether you're a man or a woman, the right gardening gloves will keep your hands comfortable, clean, and injury-free, allowing you to focus on nurturing your plants and enjoying your garden.

Start your search today and make gardening a more rewarding and hassle-free experience!